Thursday 31 January 2013

How to #2 - How to Change a Flat Tire

      My dad was an avid outdoorsman. This kept life pretty busy; we were always headed off to into the depths of the forest to explore the unknown reaches of the wilderness. Being this far out into the woods had a great deal of challenges; we never knew what we would be in for. The goal was to always make it home by Sunday night in order to not miss school for Monday morning. At the time it seemed like a big hassle to go through all these different unexpected scenario’s , but now having a chance to look back, not only are they treasured memories, I also realized that they were great opportunities to learn some practical life skills. Skills like; learning how to change a flat tire.
        I realized that not everyone has had experiences to learn these valuable lessons. There are several people who have never had the privilege of being stranded in the middle of nowhere with darkness closing in, and had no other choice but to find a way to make it work. Mostly, women are the ones who don’t seem to be taught this knowhow, but I know that there are also several men who have not had the opportunity to learn these skills. I hope these instructions will help you if you find yourself in a situation that requires you to do it yourself, no matter your gender.
Flat Tire on Car
                It might be a good idea to read one of our previous blogs “Safety on Winter Roads.” There is a lot of good information to help you to be prepared for these situations, no matter the season. Here are some supplies you will need for a tire change:

Air Pump 
Tire Gauge
Car Jack
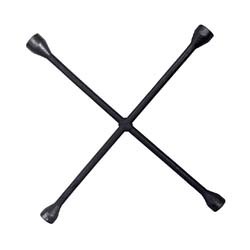
Lug Nut Wrench (Tire iron) 
Spare Tire

Blocks

Flat Screwdriver


                Some other things that would be a great help are: a flashlight, gloves, and tarp. Planning to have these things in the vehicle just in case is a great idea. Also, make sure you know your vehicle, especially where the spare and jack are located. It would be a good idea to have a look at your spare before you head out to make sure it is in good shape and has enough air in it.

                Before you get started it’s a good idea to have a look at your surroundings. When things like flat tires happen, we are not always lucky enough to be in the right place at the wrong time. Make sure you are safely out of the way of any traffic and are on flat ground if possible. Passengers should all be out of the vehicle and at least 10 feet away from the area. Turn on your hazard lights. Use blocks or large rocks under the tires to keep your vehicle from moving; place them under the front tires if you are changing a rear tire and under the rear tires if you are changing a front tire. If you are on a hill, or even a small incline, be sure to put them in the rear (if facing up hill) or in the front (if facing downhill.)

1 – Put the car in park and apply the parking break. Place manual transmission cars in gear.

2 – Get the spare, lug nut wrench, and the car jack

3 – Remove the hubcap, if Necessary. You can use a screwdriver to pry the wheel cover off. Insert the point of the screwdriver where the edge of the cover meets the wheel, and then apply a little leverage. Do this is a few different places around the edge of the cover. The cap should just pop off.

4 – Loosen the lug nuts; these hold the wheel in place. Place one edge of the lug nut wrench over a lug nut. Turn the wrench counter clockwise to loosen the nut. Loosen one, and then loosen one opposite from it. Work in a star pattern, until they are all loose. Unscrew the nuts slightly by hand. They can be on very tight, you might have to use all of your strength and leverage to get them loose.

5 – Carefully jack up the car. (Check your owner’s manual for the correct placement.) Jack the car up a little higher than is necessary to remove the old tire, leaving room to put the spare on. There should be a few inches space between the tire and the ground.

6 - Remove the lug nuts all the way. Set them in a safe place where you won’t lose them. The flat tire should have nothing holding it in place now.

7 – Remove the flat tire and set it aside.

8 – Lift the spare onto the wheel studs. The valve where you add air to the tire always faces out.

9 – Replace the lug nuts. Tighten them the same way you loosened them, working in a star pattern again. Give each one a few turns. Wait until the car is on the ground before really tighten them.

10 – Slowly lower the jack and move it out of the way.

11 – Tighten the lug nuts as much as you can with the lug nut wrench.

12- Use your tire gauge to check the tire pressure. Look in the owners' manual or (on most vehicles) on the inside of the driver's side door for the standard cold tire inflation pressure. This number is the lowest PSI one would inflate the tires to and is suggested by the car's manufacturer. If needed, use your air pump to add some air.

12- Replace the hub cap. Place the hub cap against the wheel and give it a good whack with the heel of your hand. You may want to use a rag as a cushion so you don’t hurt yourself. Don’t hit the hub cap with a wrench or hammer; you will dent it.

13 – Clean up. Make sure you pick up all of your tools and your flat tire and load them back into your vehicle.

14 - Now take a moment to relish in a job well done. You are now ready to be on your way!

                Load everyone back into the vehicle and carry on to your destination. If you still have a long distance to travel you should head for the nearest repair shop and have your flat repaired or replaced. Some spare tires are not made for travelling long distances or for going over 80km/h.

                Once you have your flat fixed or replaced make sure you put your spare tire back where it belongs, as well as all of your other tools. You want to make sure you are ready if it happens again.
                2009 Scion xB spare tire

                Having to fix a flat tire is a frustrating situation to be in. Hopefully, this will help you if you are ever in need of changing one on your own. Keep in mind if you have kids with you (or anyone who has never changed a flat before) have them watch you. It may be an experience that could help them in the future. Thanks Dad!

-Muriel Rolufs

Tuesday 15 January 2013

How To #1: How To Keep Your Vehicle From Winter Wear


  Living in Northern Canada poses its challenges year round, but the winter months are especially difficult. Harsh winter months wreak havoc on our property. Our vehicles are subjected to a wide array of wear and tear during the winter. Snow, ice, salt, and poor road conditions all contribute to the damaging effects of old man winter. Keeping your vehicle in tip top shape in the winter will help to protect your investment, help keep you safe, and keep you looking great even on the harshest days.

                         
                Before winter hits you should take a few preventative measures to get your vehicle ready.  If you prepare in advance, before the snow flies and the temperature plummets, it will help you to get off on the right foot. Firstly, call your mechanic to schedule an appointment. Before heading to the mechanic check a few things out yourself:
-Make sure all of your lights are in working order: headlights, tail lights, signal lights, and don’t forget to check your hazard lights.
- Check the condition of your windshield wiper blades; you may want to consider using winter wipers.    
-Check your winter tires; make sure the tread is in good shape.
                                                           
             If anything is not up to standard it can be fixed while you are at the shop. Now you can have your vehicle winterized and checked over by a professional. You will want to be sure they check your antifreeze levels, thermostat, heater, brakes, and defroster. Also, it’s a good idea to have an oil change done.

               Now that everything is up to standards mechanically, you should get to work on getting things well cleaned and protected. You will want to remove all of the dirt and grime collected inside and out. Wash the exterior thoroughly, including the underside. Once it is beautifully clean and dry you should apply a good coat of wax. Never use wax on chrome.  Anything that is rubber or vinyl should also be well cleaned and treated with a protecting spray. Your undercarriage should also be sealed; this can be done by a professional.  These steps will protect your exterior from the elements, and corrosive salt.

The outside is looking great, don’t stop there. Now focus your attention on the interior. Remove debris and give it a good vacuum, you could even consider a shampoo. Don’t neglect the seats. If you have leather seats, be sure to use solvent free leather cleaners; solvent based products will accelerate aging. Wipe away any dust and dirt on all surfaces, and clean the windows. Replace your floor mats with heavy duty winter mats; this will keep your carpet protected and make cleanup of dirt and snow easier. If you can, place some silica gel bags under the seats to absorb moisture. If you have a rear wheel drive, place some sand bags in the back of your vehicle to help add weight for traction.                                                                                                                                                                                                                                                                                                                                   The prep work is out of the way, let’s look at winter maintenance. Road salt and sanding help to keep our roads and sidewalks free of ice, but it can cause major damage to our vehicles body and undercarriage.  Keep a clean vehicle; have your car washed as often as possible. Now, I know what you’re going to say, “Yeah right, how do you wash your vehicle in the middle of a Canadian winter?” Well, I know it can be tough but there are indoor car washes in most cities. Or, pay a bit extra and drop it off to be done by a professional. Not every day is -30; choose a day when the weather is warmer, and preferably, a day that the sun has made an appearance.
                                                               
     After it is washed, wipe down all of the rubber door seals with a clean dry cloth. If you choose not to do this you may not be able to get your frozen doors open for the next few days, or maybe until spring. Wax after each wash.  Keep on top of the interior cleaning as well. We pull all kinds of stuff into our vehicles on our boots; salt can deteriorate your interior too. Most car washes also have vacuums you can use. A few other things to consider:
-          Try and park under cover if possible (Although anyone who has this option available is already using it.)
-          Make sure your antifreeze is clean and topped up.
-          Change engine and transmission oils regularly. Cold weather causes oil to thicken putting more strain on your engine.
-          Keep your vehicle cleared of snow. Be gentle and use a soft brush. Don’t scrape ice off the body.
-          Look over your vehicle weekly to check for potential problems.
                 Even though winter is going to throw all kinds of things your way, you are that much more prepared for it. Your investment is better protected saving you grief and money in the future.  You are also safer out on those unpredictable roads. Plus, you will be the envy of everyone you know with a vehicle that shines all winter long.            

                *Our dealership sells a product called “Diamond Kote” that is designed to prevent rust and corrosion. Consider asking for this product at the time of purchase for added protection.

- Muriel Rolufs

Monday 7 January 2013

What's The Right Vehicle For Me?

                You’ve come to that point in your life where it’s time to think about buying a vehicle. Whether it’s your first, you are upgrading, or even adding to your collection there are some things to consider that will get you into a vehicle that is right for you. You walk out onto the car lot and suddenly you are overwhelmed by the sheer selection in front of you. It’s easy to look at the beautiful, shining options and start imagining yourself in one... or more.  It’s easy to be intrigued by the beauty of a vehicle, and there is certainly something to be said for the feeling of sitting behind the wheel of something spectacular. But before we get carried away with an enticing purchase, let’s make sure it’s going to be the right fit.

What's new at queensway auto world


                There are several things to contemplate to help you make the right choice. Take a look at the type of life you lead; your lifestyle, family situation, financial position, and your future plans will all be important factors in the choice you make. Take a good look at the way you live your life and any plans you have in the next few years. If you are newly married, are children in the forecast? If you already have kids, how old are they? What stages are they going to be going through in the near future? What are your hobbies? Do you ski, snowmobile, camp or do you spend your time going to the movies and local shopping malls? Take a look at your financial situation, have you been putting money away to go towards your purchase, or are you living paycheque to paycheque?
 
                 Now that you’ve had a look at the way you live your life, you can start to look at what kind of vehicle options are available that will suite your life. If you have a family or are planning to start one you will want to look at what safety options available and what kind of cargo space a vehicle has. If your kids are still in diapers you will need room for car seats, strollers, diaper bags, etc. Older kids require room for sports gear, school bags and projects, friends and more. Bottom line kids need space. If you are single or childless, look at how many of your friends or family members you generally tote around. Also, don’t forget your pets, they need room too. If you are an outdoor enthusiast you will probably want to look at 4X4 options. Some people spend a lot of time travelling on the highway, either for work or pleasure; if that’s the case maybe something with great fuel economy would best suit you. There are additional options to add to your comfort, think about technology to make your life a little easier. Here are a few things to look at when considering vehicle options:

Safety Features
Storage Space
Technology Options
Fuel Economy
Seatbelts
Number of Seats
Blue Tooth
Gas vs. Diesel
Airbags
Trunk/Hatch
GPS
MPG
Antilock Brakes
Folding Seats
Built in DVD
Hybrid
Traction Control
Seats that Store in the floor
Built in Tire Pressure Gage
Weight/Size
All Wheel Drive
Truck Box
Car Starter
Newer Model
Weight of Vehicle
Roof Rack
Alarm
 
Car Seat Anchors
Compartments
Stereo System
 

                Sometimes you have to sacrifice one thing for another when it comes to choosing something that is right for you. If you have large family you probably won’t be able to have a small fuel efficient car, it can pose a challenge when trying to get all the kids and the groceries in after a trip to Costco. Also, budget can really determine what features you are able to afford; take a close look at what is most important to you in case you have to make a hard choice. 
                Now you have narrowed down what you need to suit your life, and your budget. You can head down to the dealership and get an experienced Salesperson to help you to pick out that beautiful vehicle. If you took the time to really look at your life you should be happy with your purchase for years to come. Happy Driving!
-Muriel Rolufs